SwiftUI with Argument Parsing
It’s easy to apply the Swift Argument Parser in the last post to a SwiftUI app. This capability can be helpful in testing by allowing you to bootstrap data into your app. In this post, you will take a minimal SwiftUI app and add argument parsing to it. Here is the app greeting that shows a greeting message to the user.

The entire code for this app is here:
import SwiftUI

final class GreetingViewModel: ObservableObject {
  @Published var name: String = "World 🌏"
}

struct GreetingView: View {
  @ObservedObject var model: GreetingViewModel
  var body: some View {
    Text("Hello, \(model.name)!").padding()
  }
}

@main
struct GreetingApp: App {
  @StateObject var model = GreetingViewModel()
  var body: some Scene {
    WindowGroup {
      GreetingView(model: model)
    }
  }
}
The GreetingViewModel holds the app’s business logic. A real app would have a more involved view model, obviously. Keep it simple for this example.
Adding in ArgumentParser
Next, add the Swift Argument Parser Swift package with File > Swift Packages > Add Package Dependency… Enter in https://github.com/apple/swift-argument-parser and click through until added and finished.
Back in the source file, add this to the top of the file:
import ArgumentParser

struct GreetingArguments: ParsableArguments {
  @Option(help: "Override the greeting name")
  var name: String?
}
Notice that since this isn’t a command. You create a type conforming to ParsableArguments, so you don’t need to implement a run method.
Create a helper for updating parameters
Now add this:
extension GreetingArguments {
  func update(_ viewModel: GreetingViewModel) {
    if let name = name {
      viewModel.name = name
    }
  }
}
This update isn’t part of the protocol; it is just a convenient method that clarifies the type for updating GreetingViewModel.
Using GreetingArguments
Next change how the source of truth is created with the below code:
@StateObject var model: GreetingViewModel = {
  let model = GreetingViewModel()
  do {
    let args = try GreetingArguments.parse()
    args.update(model)
  }
  catch {
    print("Error: Could not parse arguments")
    print(CommandLine.arguments.dropFirst().joined(separator: " "))
    print(GreetingArguments.helpMessage())
  }
  return model
}()
This code makes a closure and calls it to produce a GreetingViewModel type. You call parse and update the model.
If you run the app now, you won’t see any difference.
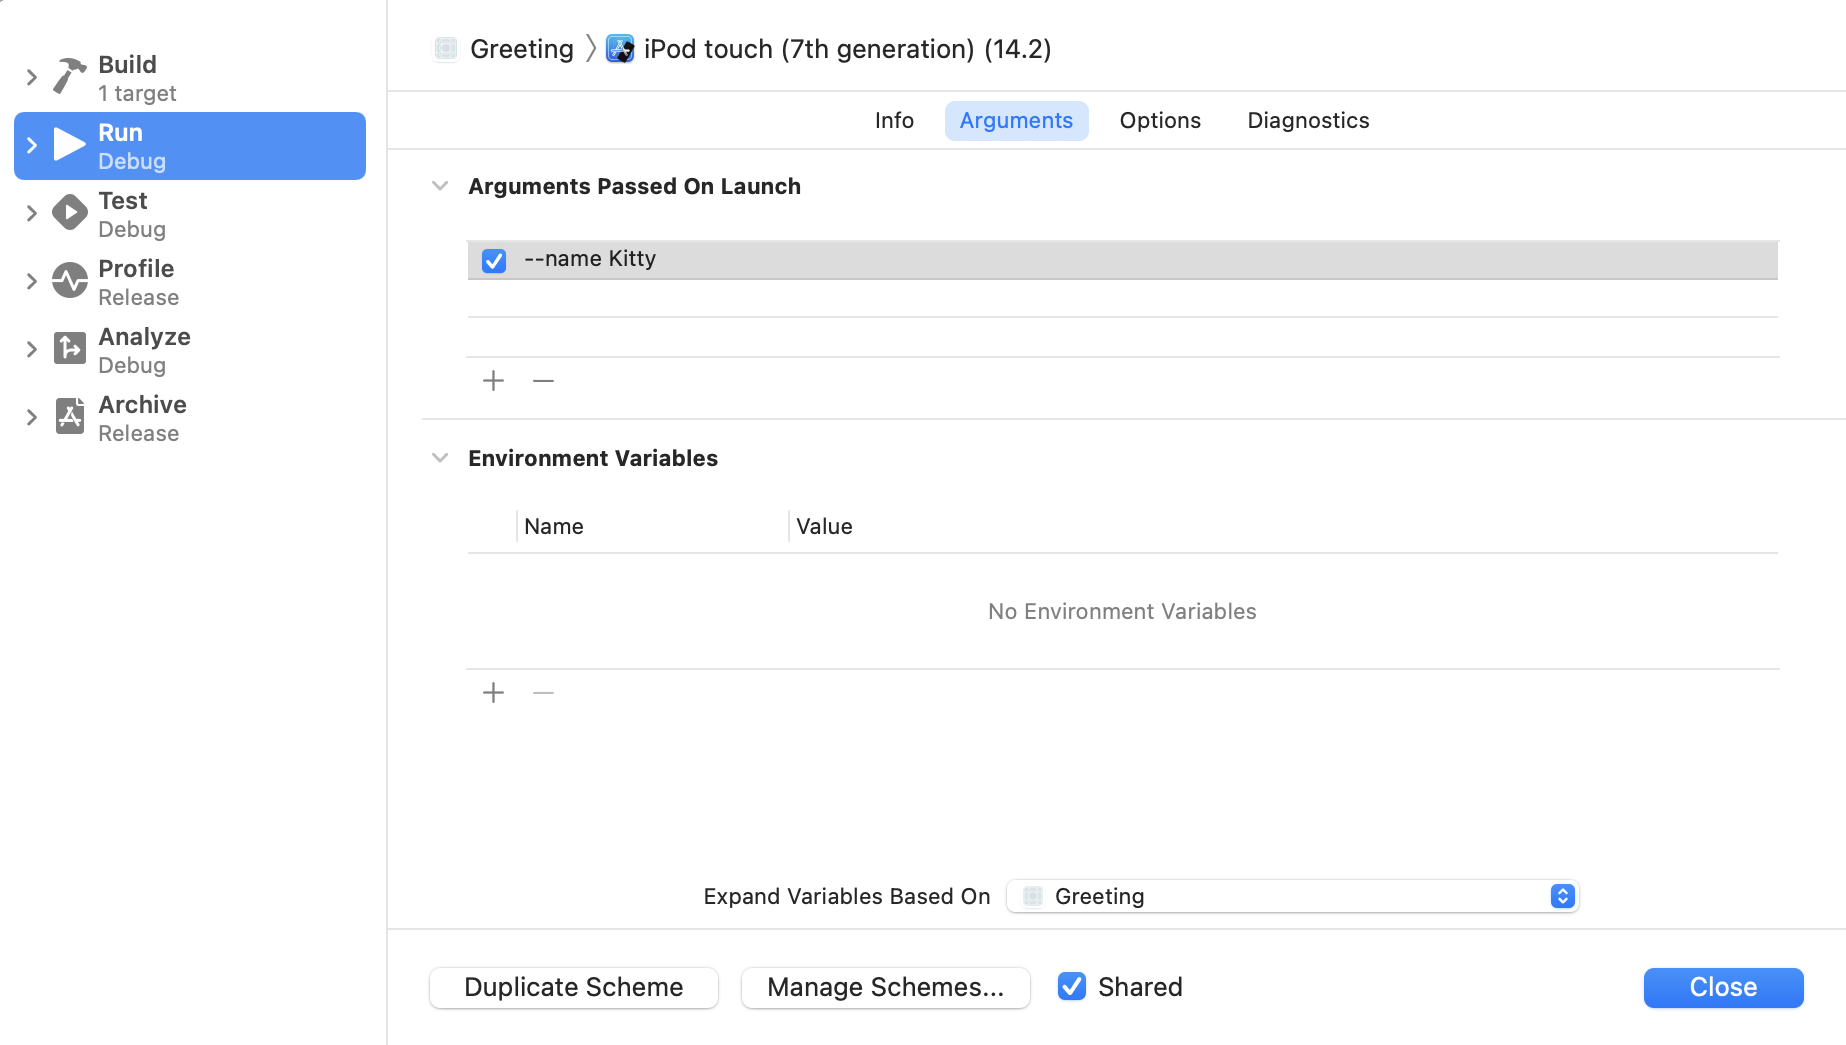
There’s no difference because you haven’t passed an option. To do that, open the scheme with Command < and enter it like so:
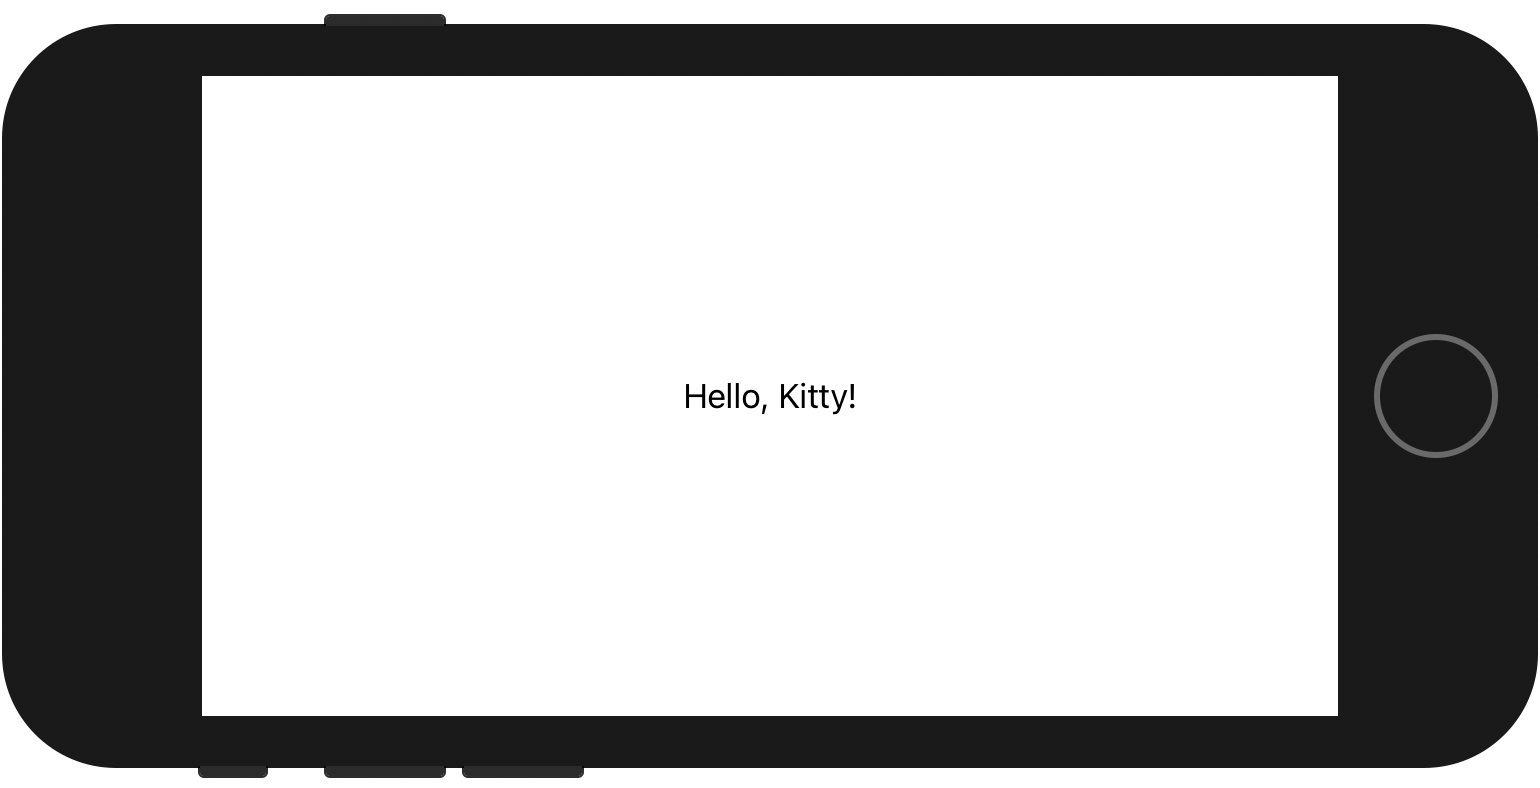
When you run the app now you will get this:
Error handling
If you enter invalid arguments, the app will still run but will print messages to the console.
Error: Could not parse arguments
Kitty
USAGE: greeting_arguments [--name <name>]

OPTIONS:
  --name <name>           Override the greeting name
  -h, --help              Show help information.
Here, you didn’t put in --name, so it failed to parse. It is a soft error and the app launches, but you could easily make it trap as well.
Final thoughts
Adding a command line to your app is a great way to improve development speed by generating fake data to test things out. The example here is trivial, but easy to imagine how you could scale it up to a larger project.