Command Line Tools in Swift
Command-line interfaces (CLIs) provide a robust, textual way to communicate with your programs. Swift, as a general-purpose computing platform, lets you build these kinds of tools efficiently and elegantly. In this post, you’ll have a look at the Swift package Argument Parser, which handles all the boilerplate of creating a full-featured, command-line interface.
Building m25
To guide your journey, you’ll build a command-line tool to help practice multiplication called m25. (Mental math books suggest that one memorize the 25x25 table if you want to go fast.)
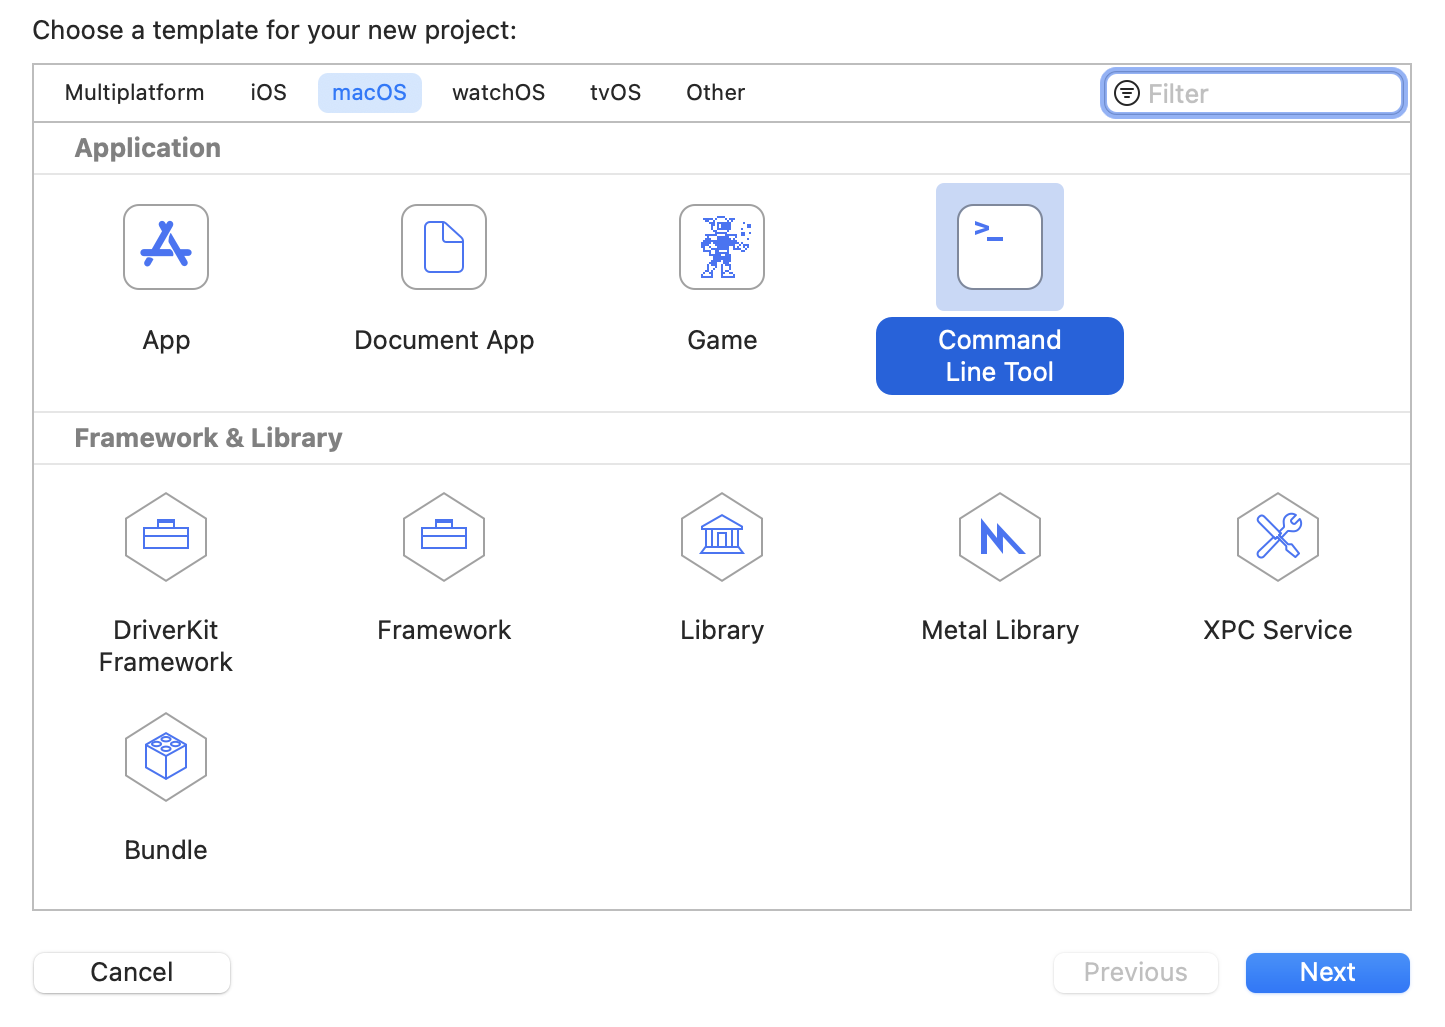
Open Xcode and create a macOS command-line tool called m25. The convention for command-line tools is to use lower-case names.
Start with an abstraction for questions and answers. Open the file main.swift and replace it with this:
import Foundation

struct Multiplication {
  var a, b: Int
  var question: String { "\(a)·\(b)" }
  var answer: String { "\(a*b)" }
}
Using this abstraction, you can generate a list of shuffled multiplications:
let numberToStudy = 12
let multiplications = (2...25).map {
  Multiplication(a: numberToStudy, b: $0)
}.shuffled()
This code maps the numbers two through twenty-five to multiplication questions. Now you have a random list of multiplications. Next, add this:
var correctResponseCount = 0

for (offset, mult) in multiplications.enumerated() {

    print("Question \(offset+1) of \(multiplications.count)")
    print(mult.question)

    let response = readLine(strippingNewline: true)?
        .trimmingCharacters(in: .whitespaces)

    if response == mult.answer {
      print("⭐️ Correct")
      correctResponseCount += 1
    } else {
        print("❌ Incorrect \(mult.question) = \(mult.answer)")
    }
}

let performance = Int(Double(correctResponseCount) /
                      Double(multiplications.count) * 100)
print("🏁🏁🏁 Finished \(performance)% 🏁🏁🏁")
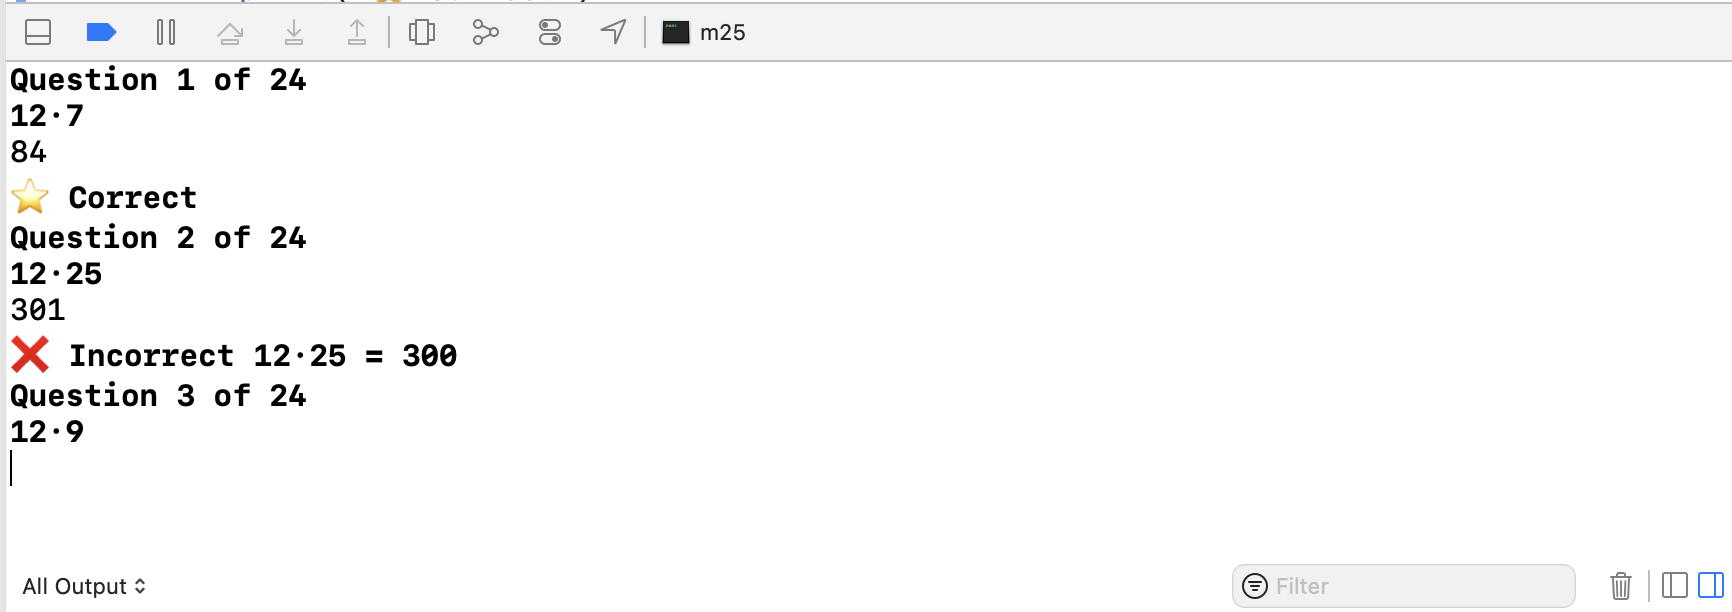
This code enumerates through the problems, prints a question, takes in a response, removing whitespace and grades the results. After you finish, it shows the percentage you got correct.
Run the app and look in the debug console window type in some answers. You may need to hit Command-Shift-Y to toggle the console area.
This CLI is already useful… at least for studying 12. What if you want to study a different number?
The hard way
To parse arguments yourself, you can use the CommandLine to get arguments from the command line. Use this to get the number to study by replacing let numberToStudy = 12 with this:
guard let numberToStudy = CommandLine.arguments.dropFirst()
        .first.flatMap(Int.init) else {
  print("Need a number to study")
  exit(-1)
}
The above code gets the second argument and tries to parse it as an Int. If it fails, it prints a message and exits. When you run the program, you’ll see this:
Need a number to study
Program ended with exit code: 255
Fortunately, Xcode allows you to specify arguments to a starting app or application easily. Open the scheme with Command < switch to Arguments tab and add 15 to Arguments Passed On Launch.
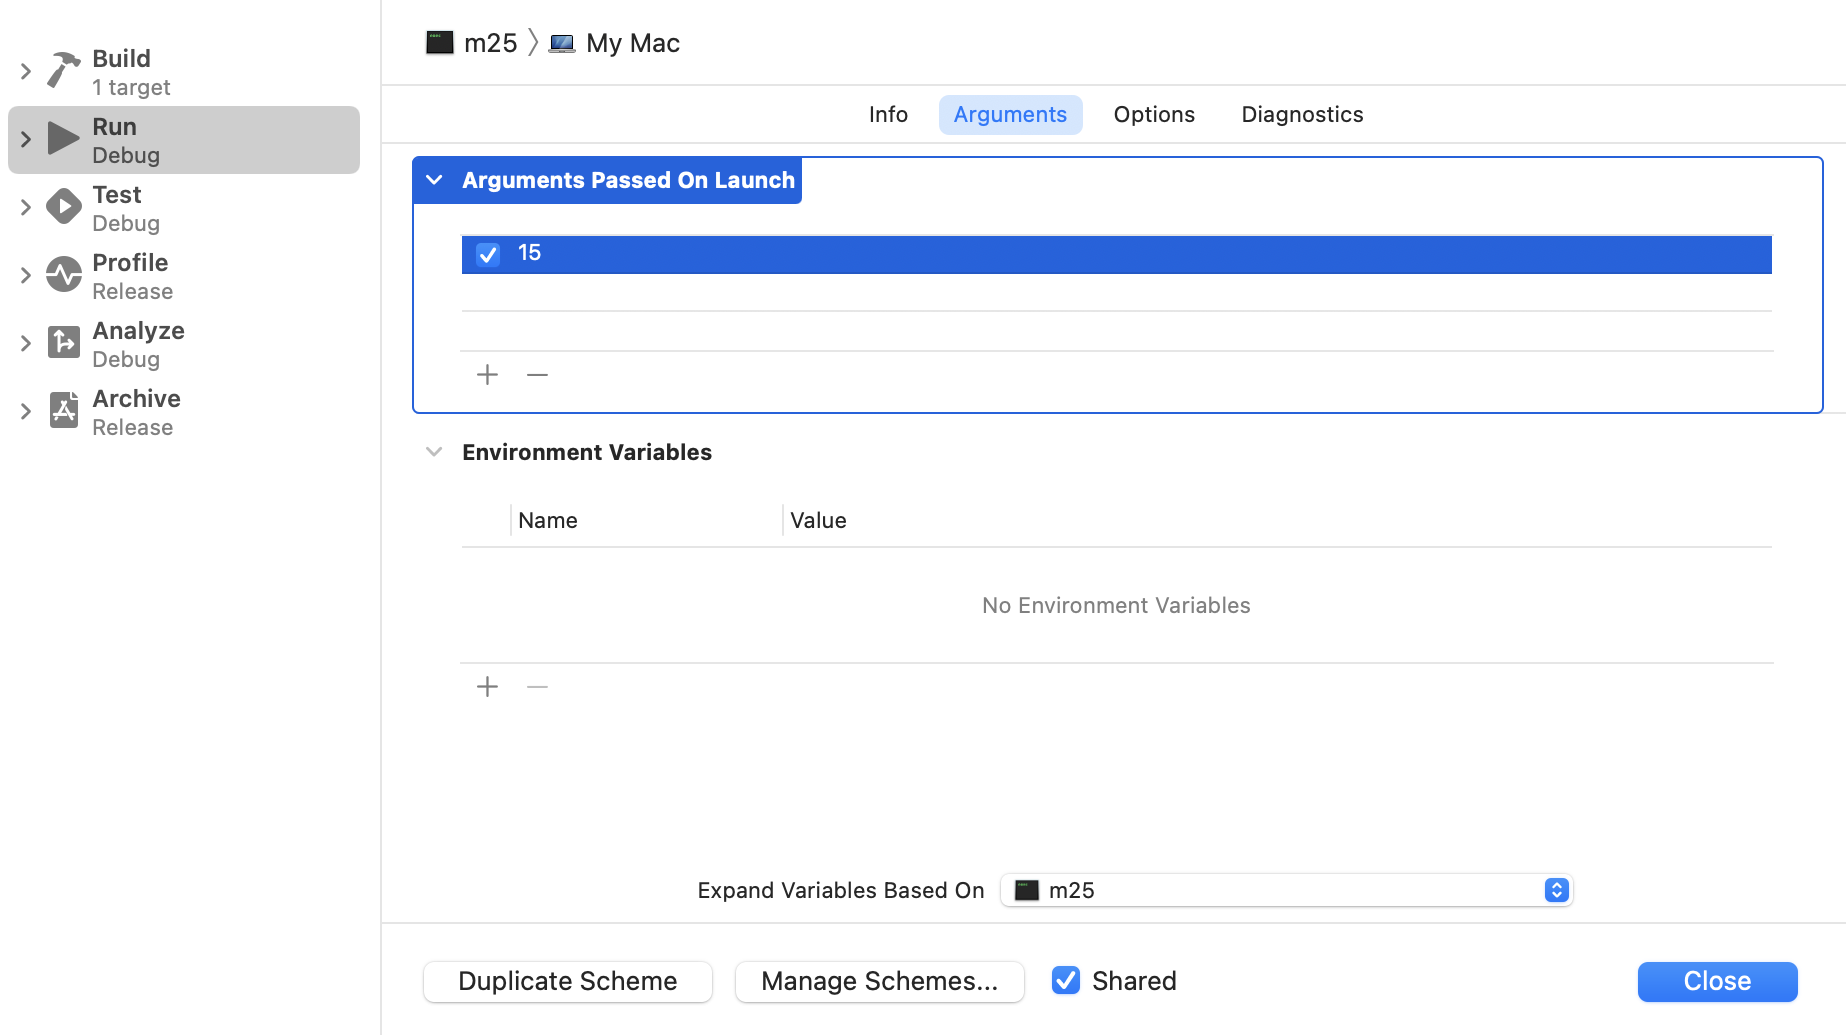
Now when you run the program, you will again be able to answer questions, but this time for 15.
Adding ArgumentParser
You probably want to add more features to the application, and while it is possible using the CommandLine object directly, you are better off leveraging Argument Parser.
To add the Swift Package, go to Xcode File : Swift Packages : Add Package Dependency. Then add https://github.com/apple/swift-argument-parser to the search field and press Next. You will see something like this:
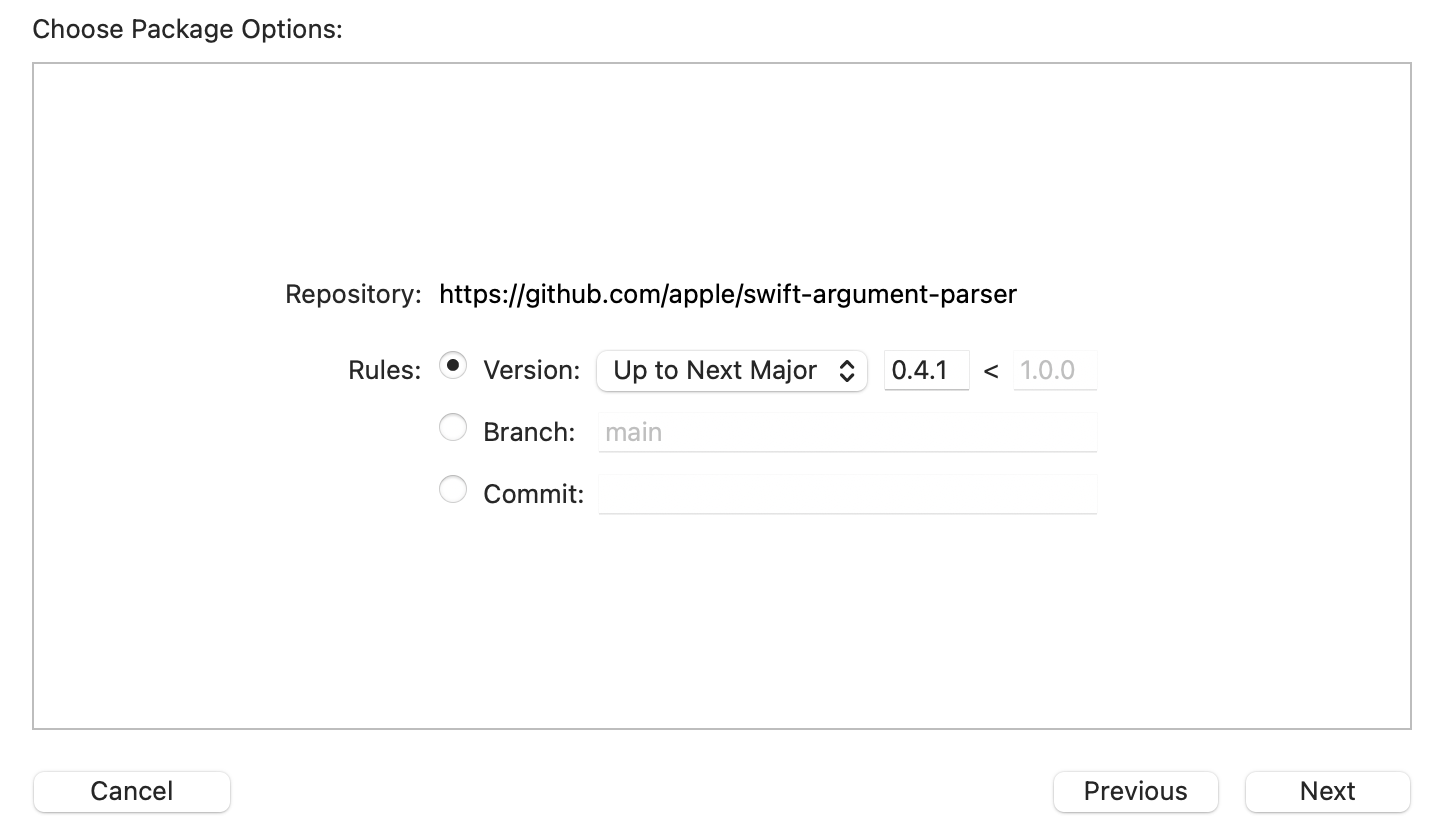
Press Next again. Make sure your target m25 has ArgumentParser checked and click Finish.
Using ArgumentParser
You can now convert your main.swift over to using ArgumentParser. First, at the top of the file, add this:
import ArgumentParser
Next, you will create a type called RunQuiz that conforms to the ParsableCommand protocol. It has a run method that will do the work you did previously. Remove numberToStudy and add it as a property to RunQuiz. It will look like so:
import ArgumentParser
import Foundation

struct Multiplication {
  var a, b: Int
  var question: String { "\(a)·\(b)" }
  var answer: String { "\(a*b)" }
}

struct RunQuiz: ParsableCommand {
  @Argument
  var numberToStudy: Int

  mutating func run() throws {
    let multiplications = (2...25).map {
      Multiplication(a: numberToStudy, b: $0)
    }.shuffled()

    var correctResponseCount = 0
    for (offset, mult) in multiplications.enumerated() {
      print("Question \(offset+1) of \(multiplications.count)")
      print(mult.question)
      let response = readLine(strippingNewline: true)?
        .trimmingCharacters(in: .whitespaces)

      if response == mult.answer {
        print("⭐️ Correct")
        correctResponseCount += 1
      }
      else {
        print("❌ Incorrect \(mult.question) = \(mult.answer)")
      }
    }

    let performance = Int(Double(correctResponseCount) /
                          Double(multiplications.count) * 100)
    print("🏁🏁🏁 Finished \(performance)% 🏁🏁🏁")
  }
}

RunQuiz.main()
Your variable, numberToStudy, is now modified with the property wrapper @Argument, which tells the parser that this is a required argument. You call RunQuiz.main(). This statement starts the argument parser going, which will find numberToStudy and call the run method for you.
The behavior works the same as before but with a few improvements. Go back to the scheme (with Command <) and stop the argument 15 from being passed in by unchecking the box. You will get this output when you run the program:
Error: Missing expected argument '<number-to-study>'

USAGE: run-quiz <number-to-study>

ARGUMENTS:
  <number-to-study>

OPTIONS:
  -h, --help              Show help information.

Program ended with exit code: 64
That’s pretty great. Automatic error checking and reporting and some help too.
Add help
You can improve the help text of number-to-study by specifying help in your @Argument. Change the property to this:
@Argument(help: "Specify the number to study.")
var numberToStudy: Int
Rerun it to see the improved help.
Change the type
One of the advantages of using the argument parser is that it uses the type of the property to direct its processing. To see how you can use this to great effect, change numberToStudy: Int to numbersToStudy: [Int] like so:
@Argument(help: "Specify the numbers to study.")
var numbersToStudy: [Int]
Now that it is an array, you need to change how the multiplications are generated. Change the code to this:
let multiplications = numbersToStudy.flatMap { a in
  (2...25).map { b in
    Multiplication(a: a, b: b)
  }
}.shuffled()
Open the scheme and change the argument to 10 11. Just like that, you can practice a batch of numbers.
Add an option
@Argument says that a property is required for the command to run. An option is, well, optional. Suppose you want to limit the number of questions that appear. To do that, first create a limit property like this:
  @Option(name: .shortAndLong, help: "Limit the number of questions.")
  var limit: Int?
If limit is nil there is no limit. If it is non-nil, it limits the questions to that number. Change your code to respect this property:
let all = numbersToStudy.flatMap { a in
  (2...25).map { b in
    Multiplication(a: a, b: b)
  }
}.shuffled()
let multiplications = limit.map { Array(all.prefix($0)) } ?? all
The help now looks like this:
USAGE: run-quiz [<numbers-to-study> ...] [--limit <limit>]

ARGUMENTS:
  <numbers-to-study>      Specify the numbers to study.

OPTIONS:
  -l, --limit <limit>     Limit the number of questions.
  -h, --help              Show help information.

Program ended with exit code: 0
By specifying the name of the option to be .shortAndLong, it used the name of the property limit (long) and just the first letter l (short).
Note: If you have two options with the same argument name will have an assertion failure at runtime.
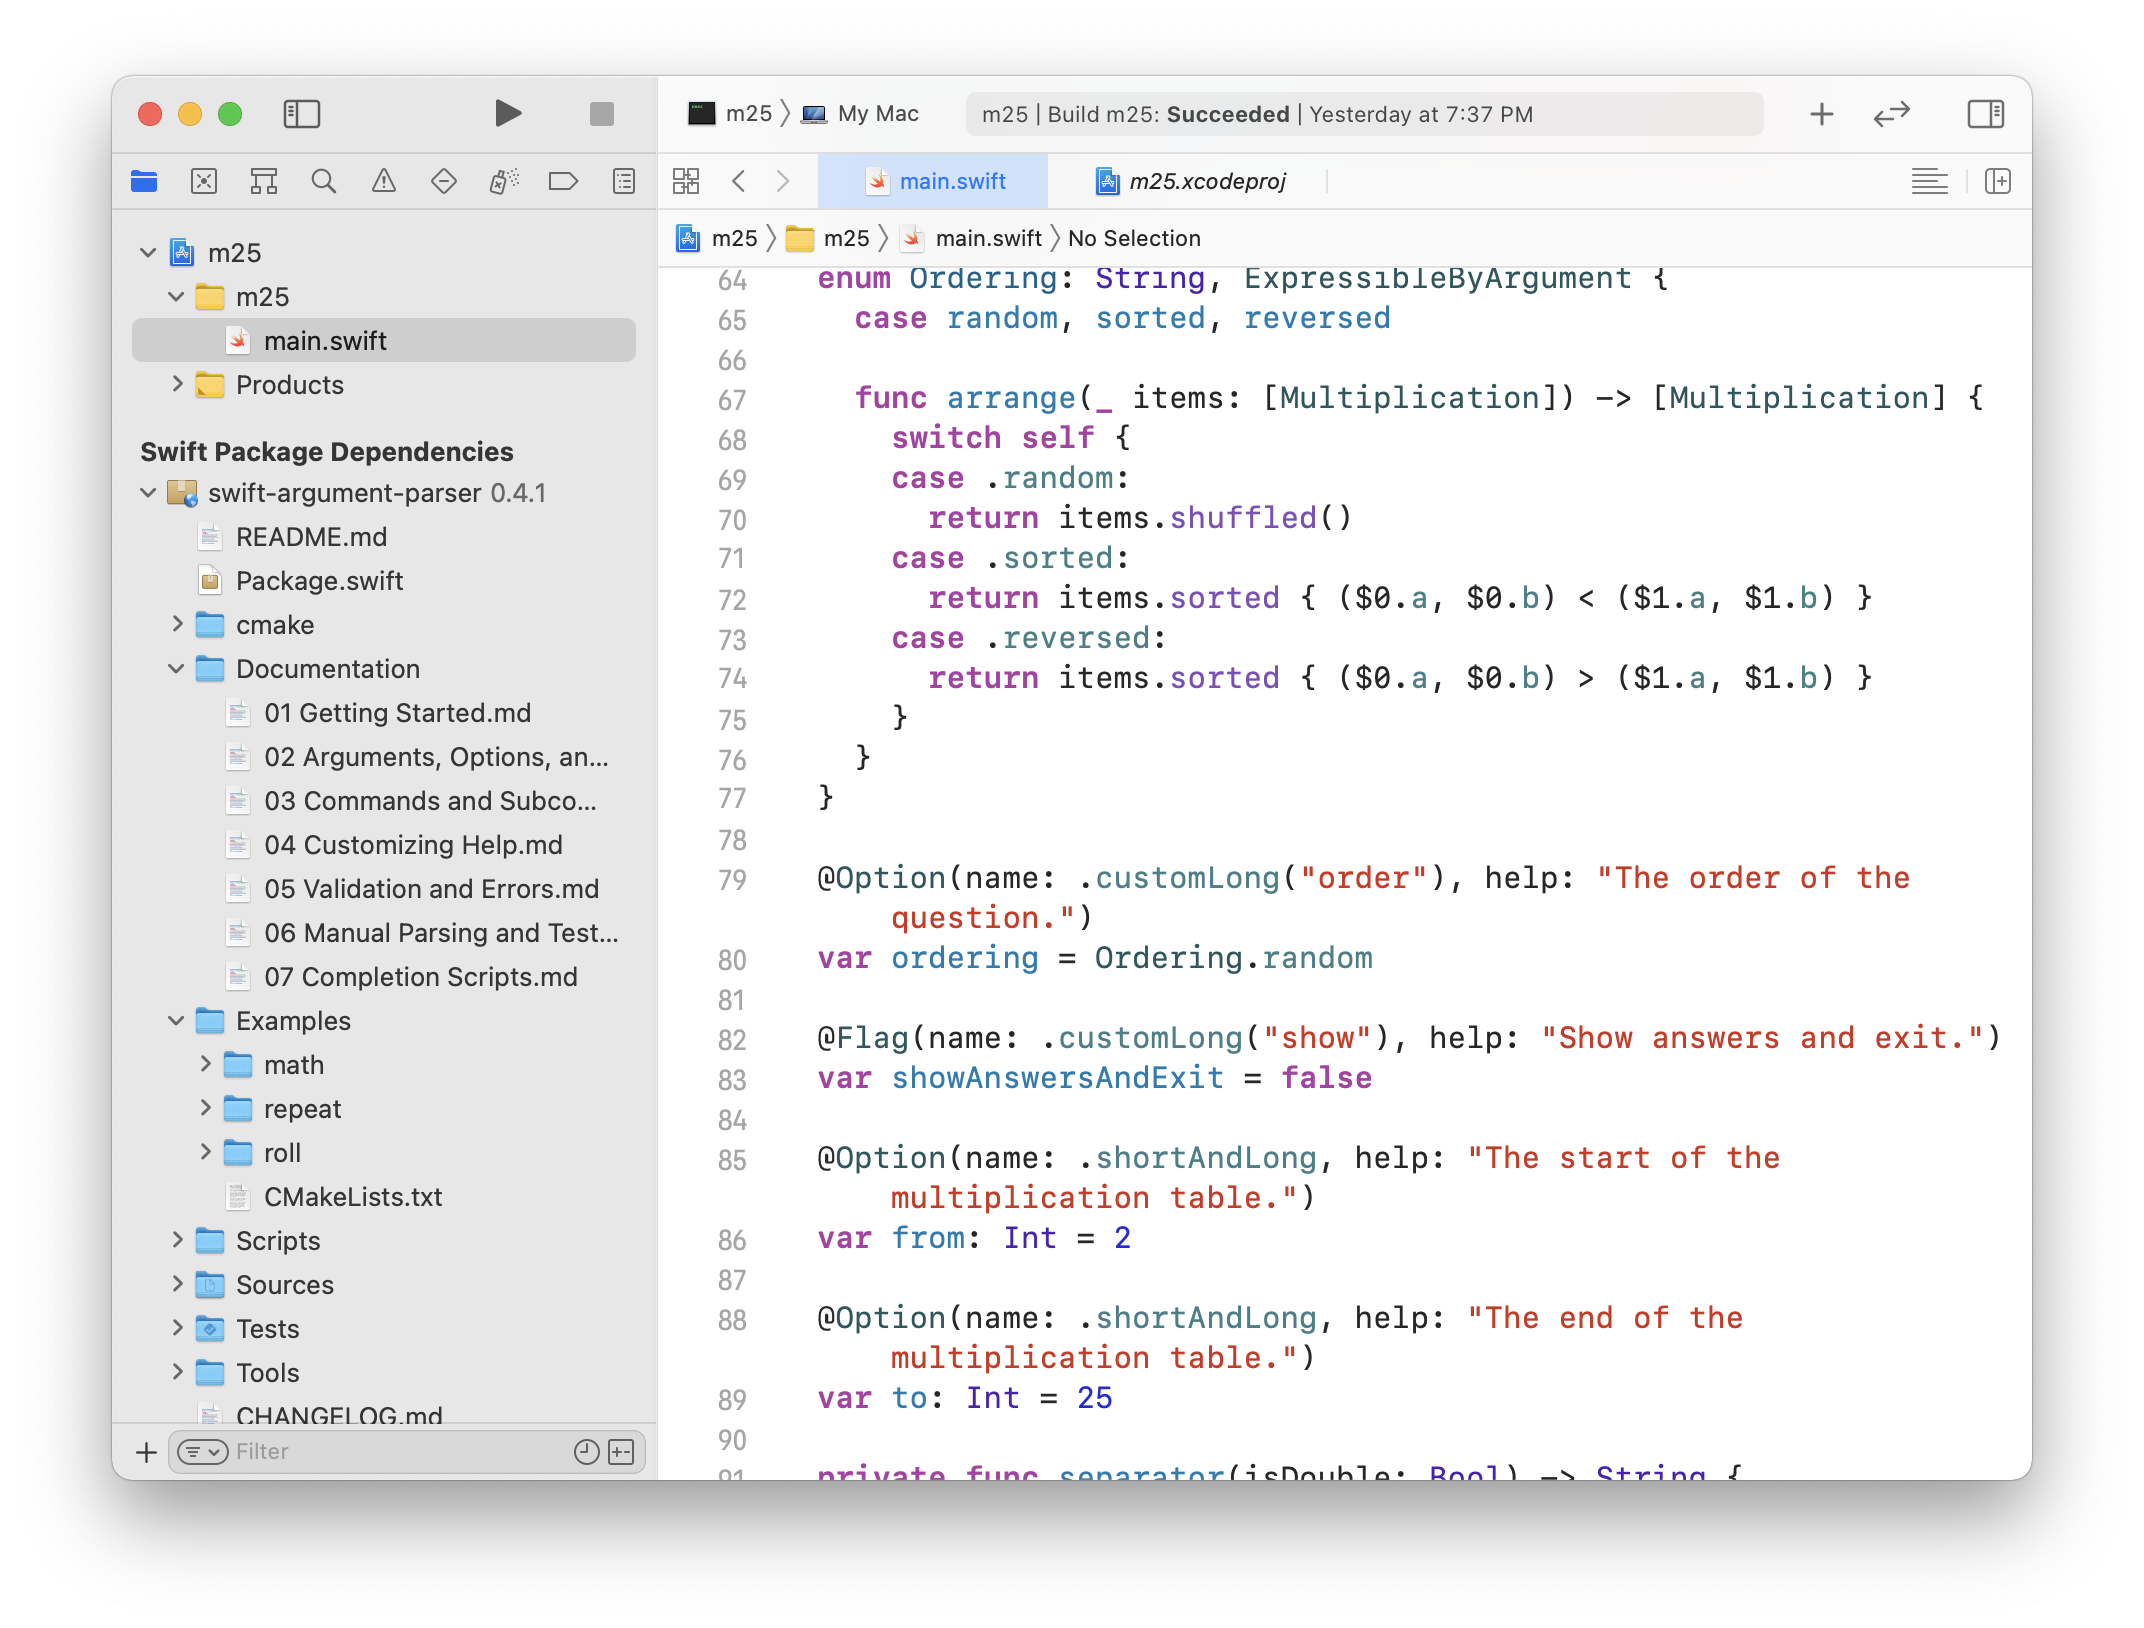
Enumerated options
Now create an option that controls the order of multiplication questions. Add this nested enumeration to the RunQuiz type:
enum Ordering: String, ExpressibleByArgument {
  case random, sorted, reversed

  func arrange(_ items: [Multiplication]) -> [Multiplication] {
    switch self {
    case .random:
      return items.shuffled()
    case .sorted:
      return items.sorted { ($0.a, $0.b) < ($1.a, $1.b) }
    case .reversed:
      return items.sorted { ($0.a, $0.b) > ($1.a, $1.b) }
    }
  }
}
This enumeration is a raw representable string and importantly conforms to ExpressibleByArgument. It defines three cases .random, .sorted and reversed. It also has a helper method that arranges a list of multiplication items based on the ordering.
Add this property:
@Option(name: .customLong("order"), help: "The order of the question.")
var ordering = Ordering.random
Now replace the logic for generating questions, using the ordering property:
let all = numbersToStudy.flatMap { a in
  (2...25).map { b in
    Multiplication(a: a, b: b)
  }
}

let ordered = ordering.arrange(all)

let multiplications = limit.map { Array(ordered.prefix($0)) } ?? ordered
Now you can practice multiplication shuffled, in order, or even reversed.
Flags
Now create a boolean flag using @Flag right after the limit property:
@Flag(name: .customLong("show"), help: "Show answers and exit.")
var showAnswersAndExit = false
Notice how you can use a name that is different from the property name. Use the variable right after you compute multiplications.
guard !showAnswersAndExit else {
  multiplications.forEach { mult in
    print(mult.question, "=", mult.answer)
  }
  return
}
Try it out by running with the arguments ‘17 –order sorted –show –limit 5`. You should this:
17·2 = 34
17·3 = 51
17·4 = 68
17·5 = 85
17·6 = 102
Set range of multiplications
Give the user the ability to set the range of multiplications. Start by adding these option properties:
@Option(name: .shortAndLong, help: "The start of the multiplication table.")
var from: Int = 2

@Option(name: .shortAndLong, help: "The end of the multiplication table.")
var to: Int = 25
Next, change how you compute all by using the properties:
let all = numbersToStudy.flatMap { a in
  (from...to).map { b in
     Multiplication(a: a, b: b)
   }
}
What will happen if the user specifies the to property smaller than from? Yes, it will trap and crash the program. On my machine, the crash looks like this:
Fatal error: Can't form Range with upperBound < lowerBound: file Swift/x86_64-apple-macos.swiftinterface, line 5584
Not very nice. Fortunately, the ParsableCommand lets you implement a validate method. Add this method to RunQuiz:
mutating func validate() throws {
  guard from <= to else {
    throw ValidationError("`from` must be smaller or equal to `to`.")
  }
}
This method lets you check out all of your arguments and parameters before run gets called. Now, if you launch the command with illegal --from and --to options, you will get the helpful message:
Error: `from` must be smaller or equal to `to`.
Adding some final touches
The ParsableCommand protocol lets you return a custom configuration object that allows you to change many more options. Many of them are self-explanatory.
Add this to RunQuiz:
static var configuration: CommandConfiguration {
  CommandConfiguration(commandName: "m25",
                       abstract: "Practice multiplication at the console.",
                       discussion: """
      Practice your multiplication table.

      Examples:
         # Practice 12x2 up to 12x25 in random order.
         m25 12

        # Practice 12x2 up to 12x25, present questions in order.
        m25 --order sorted 12

        # Practice 12, 13, and 14
        m25 12 13 14

        # Practice 15, 16 but limit to 10 questions.
        m25 15 16 --limit 10

        # Show 12x2 to 12x25 in order and exit.
        m25 12 --show --order reversed

        # Show 12x12 to 12x24 in order and exit
        m25 12 --show --order sorted --from 12 --to 24
   """)
}
This configuration explicitly names the command to be m25 instead of run-quiz. It also provides more detailed examples of usage.
Additionally, you might want to add some output formatting.
Final thoughts
Command-line tools are super powerful, and the Swift Argument Parser makes it quick and easy to put together a robust interface.
While you have used many of the features of argument parser in this little example, there are many more things to explore, including parsing custom types, changing parsing strategies, subcommands, and generating completion scripts automatically. The argument parser package comes with some excellent documentation itself, and it is easy to access from Xcode’s file navigator. Check out the Documentation and Examples folders.
You can find the code for this post here: https://github.com/rayfix/m25.
If you find this post helpful or have questions, please reach out to me on Twitter @rayfix.